|
As I've said elswhere on this site, I don't do much work in chains, and even less in "ordinary" chains, i.e., curb chains, chain mail weaves, etc. I did some tiny samples of a couple of the latter, and actually completed a necklace length chain of the full-Persian 6-1 weave, though, and lately I've turned my attention to a related pattern, the half-Persian 4-1. This appears to consist of two independent biased stacks of rings that do not connect within themselves, but which cross each other to bind the weave together. It is described fully and excellent instructions are available elsewhere, so I will not attempt to duplicate that information here.
|
|
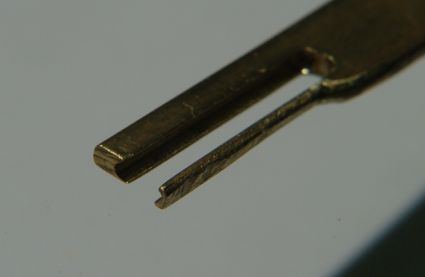
One of the difficulties with this weave, once it's been started (a problem of no small measure in itself) is that you have to line up the rings in one row, with the new ring, and then add the ring in the other row, without losing track or letting go of anything.
|

|
I suppose if one were to use ordinary size rings it might not be so hard, but I was trying to make this chain:
|
|
|
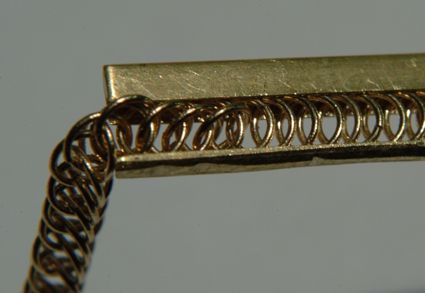
It's not so easy when you can't see or reach the rings once you have them between your thumb and forefinger, due to their small size. I worked up a small fixture that would hold one row of rings together and let me feed the other rings into the crossing row. The picture below is not the first one I tried, and it's been modified from its first coming into existence, since I only realized after the fact that unless one side of the gap were very close to the edge, I couldn't get the open rings into it without bending them past the point of usability.
|
|
Notice the internal shape of the slot, cut concave so that the rings can slide up and down its length, and close enough together that the edges keep the rings captive.
|
|
|

|
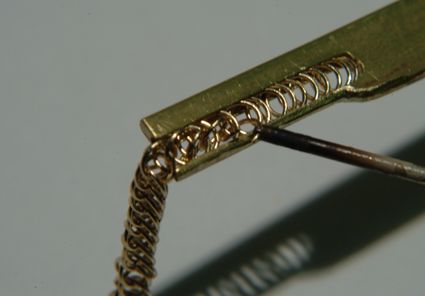
Here's a shot that shows me adding closed rings to the fixture.
|
|
|
All I have to do is load up to a dozen closed rings into the slot and then insert the end of the chain:
|
|
|
|
The trick here is to be able to hang onto the open ring and screw it into place, down through the last attached ring, through the first loose one, and up again, then pinch it closed.
|
|
I don't worry much about my closures at this point, I just complete ten or a dozen links and then pull it off the fixture so I can get to the rings with my tweezers and clean them up a bit. Since the rings will all be soldered shut before I'm done, even slightly ragged joints will be reasonably concealed, even if I were to use rings large enough to be easily examined without magnification.
For those who are curious, the rings are 0.095" ID, made with 18K yellow gold wire that is 0.015" in diameter.
|
|
This morning (09-23-04) I discovered that the fixture makes it easier to repair a broken chain, too. Easier is a relative term, however, and I don't look forward to doing that again anytime soon. If I were to sell this kind of chain, the cost for it, without soldering the rings, would be $25/inch, with no warranty against breakage. This particular length that I'm working on now will have every link soldered, inspected, and guaranteed against breakage in normal wear. The cost for such a chain is higher than a reasonable person could be expected to pay. (Unreasonable persons are welcome to make enquiries via email.)
|
|
|
